
This post is the first part of a series, you can read the other posts here:
Part I - Final Fantasy VII scene reconstruction using Blender (Part 1)
Part III - Importing the reconstructed Final Fantasy VII scene into Three.js
In the previous part of our tutorial, we imported a background, guessed the camera position and designed the walkmesh.
However, we were still having issues with occlusion.
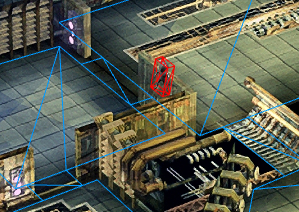
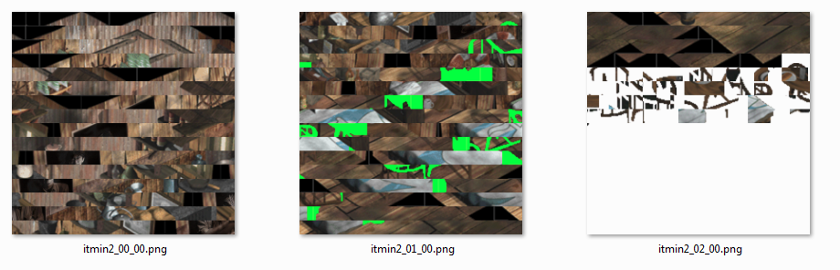
For solving this, there are a couple of ways, one can be importing the game masks and placing them as we are doing in a few steps.
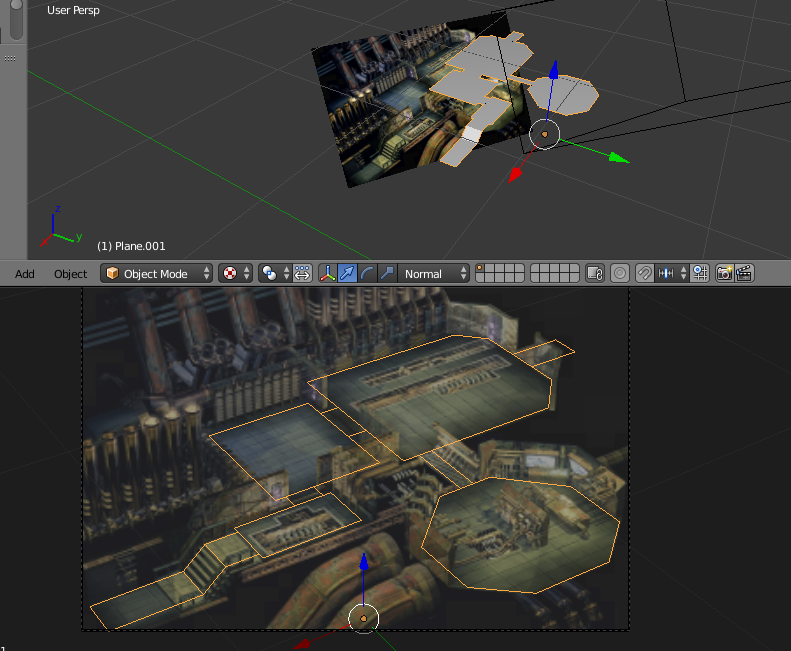
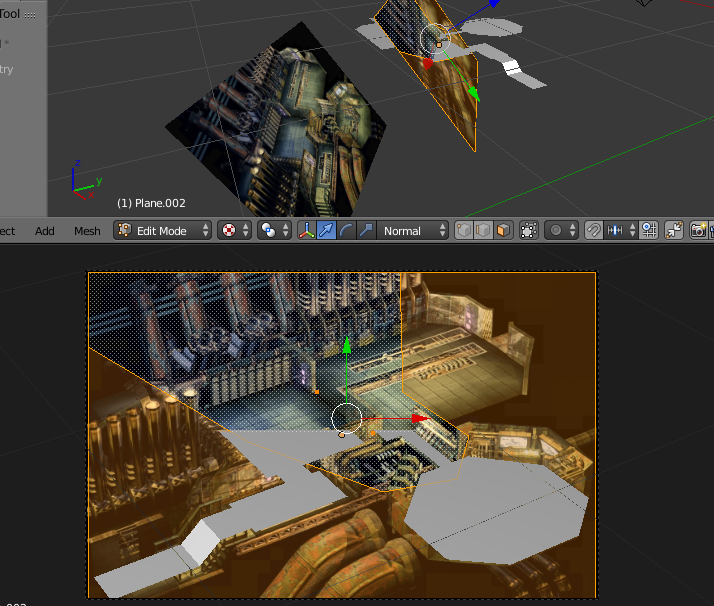
But this is a bit complicated, and you need to mess with the game files again. I've guessed another way to achieve occlusion while messing with Blender that works pretty well and it's easy to do. First, take the background plane and duplicate it Ctrl+D. Once you have two copies of the same background plane, move it towards the camera (remember that Local coordinates must be set in the 3d view in order to achieve this). Move it to the distance where the object you want to create should be from the camera, this usually means you have to move it to one corner of the walkmesh. As you approach the plane to the camera, the texture will look bigger. So also scale it down after approaching it to the camera, the plane edges always have to match the camera's limits
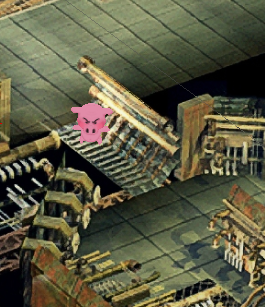
In my case, for fixing the corner were the occlusion problems were happening, I moved the plane forward until the exact corner where the wall should be placed (marked by the red crosshair in the image above). You can see how the plane occludes half of the walkmesh.
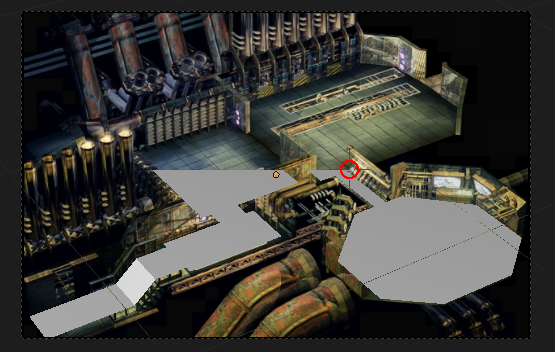
Now, selecting the closest plane to the camera (the plane where the wall is going to be placed), go to edit mode, camera's point of view, and using the knife tool K do some "papercraft" and cut the shape of the wall.
The places out of the shape of the wall must be removed.
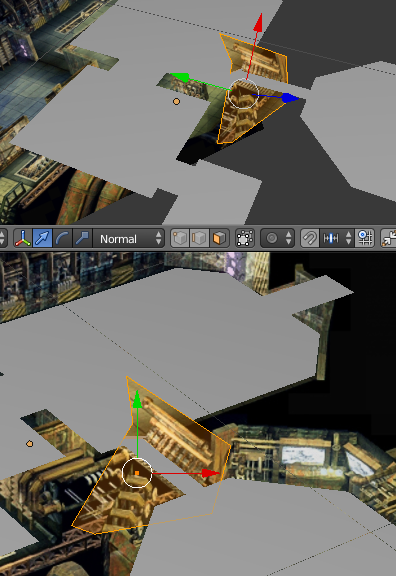
After doing many cuts and deleting the pieces of the plane we don't want (remember we only want the wall). We should end up with something like this, you must use the zoom in for more precise cuts if you want to get the perfect shape.
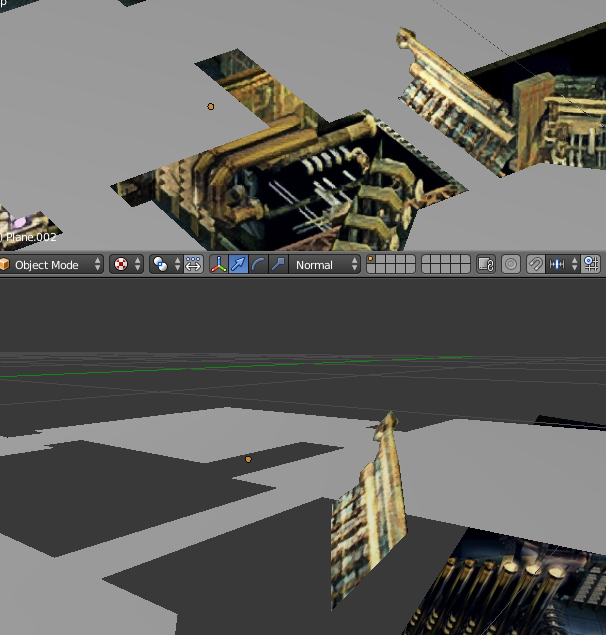
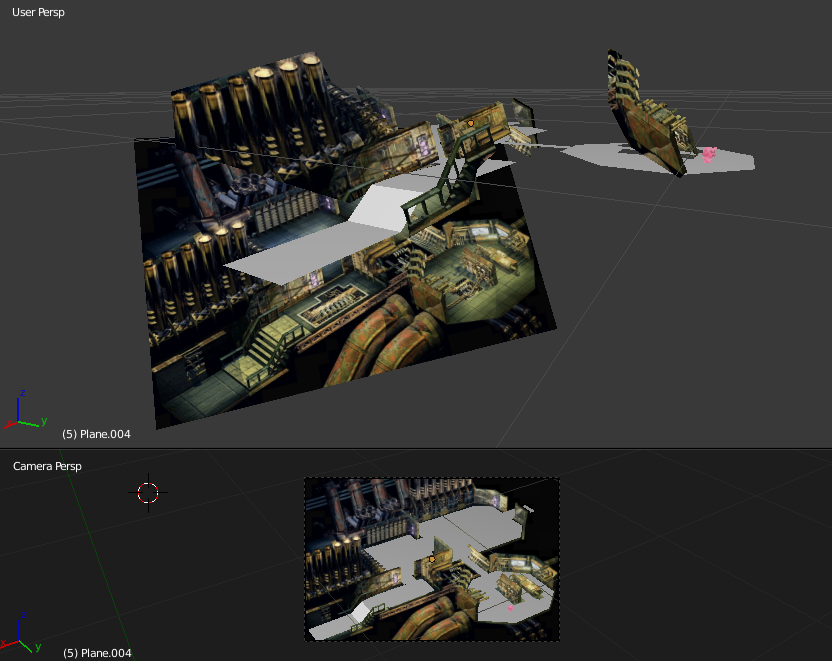
If you take a look to the upper part of the image, from the camera's view the wall looks integrated and occluding as it should be with the walking plane. From another point of view, the whole thing may look messed up, but that's the magic of perspective ;).
Now we can place a character, and move it behind or in front of the wall, and the behavior and visuals are going to be as expected.
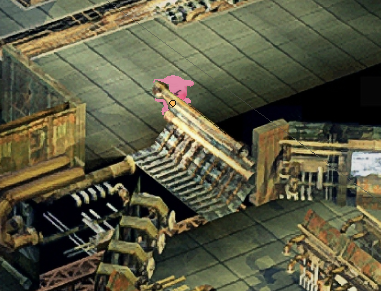
Keep doing this for every object in the scene that could hide the character from the camera.
After doing this method for every object that needs it in the scene, the visual reconstruction of the scene will be finished.
What is amazing about this technique, is that everything on the scene can be reconstructed out of a single image. That means that in this time we reconstructed an 3D scene from Final Fantasy VII, but we can extend this for drawings or real life pictures.
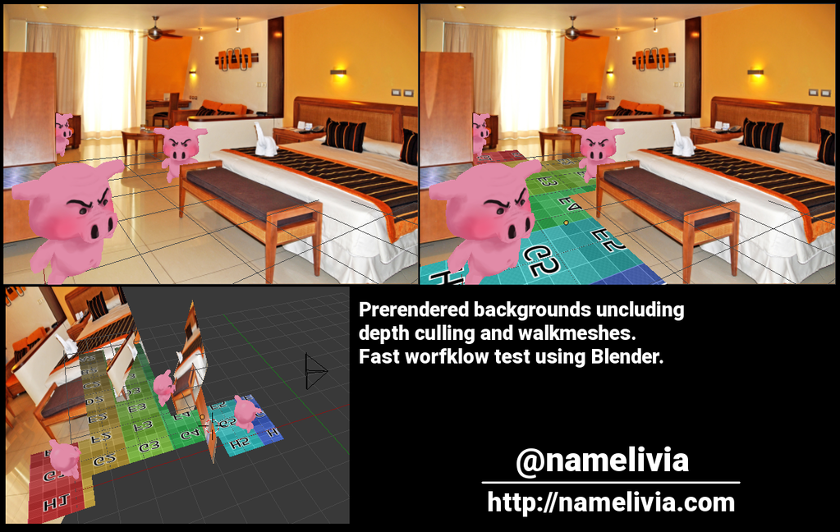
So we could extend our future Final Fantasy like game with new scenarios, or modifying the existing ones just by drawing in top of them, or using The Gimp and then apply this method to recreate the 3D space contained.
For now this is it! In the next part of this tutorial I will show you how to import the resulting scene into three.js to move a character around the scene in your browser!