
As some of you may know, I use a Archlinux+Openbox desktop environment in my computer. This means I have a superlight system that allows me to work fast and my laptop never gets obsolete.
The B-side of this is that you have to make your own solutions for many thigs that an OSX or Windows user will never imagine that would have to be ever making, because it comes by default. Todays post deals with volume control.
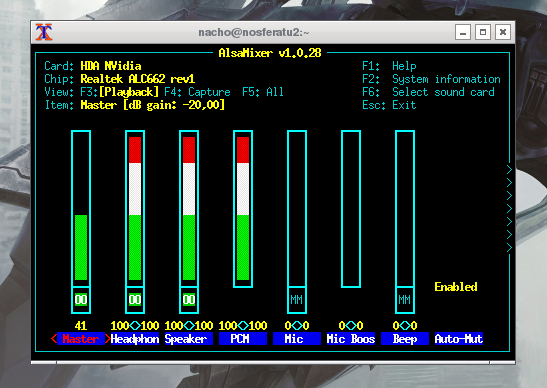
The starting point is that we only have an empty desktop environment, and the only way to access to volume control is using the command line through things like alsamixer.
This is kind of annoying so I'm building a new way of dealing with volume.
Keybindings
The first thing I'm going to do it's to define some key shortcuts for dealing with volume without having to open a terminal window or anything. Keybindings for openbox are defined in the file rc.xml so let's edit it:
sudo vim /etc/xdg/openbox/rc.xml
Then if you go to the keybindings part there are some already defined, and you can define your own (I have already keyboard shortcuts for my most used applications).
We could look for a key combination for dealing with volume, but I will override two of the already defined keybindings, the ones that are defined to switch to an upper and lower desktop.
I use to work with several desktops, but four are enough for me and I have them horizontally placed.

Since I'm used to use the keyboard shortcut for switching desktops from left to right, turning volume up and down will be very natural here.
The alsa command for switching volume up and down are, volume up:
amixer -q sset Master 3%+
And volume down:
amixer -q sset Master 3%-
So the final setup is:
<keybind key="C-A-Left">
	<action name="GoToDesktop">
    	<to>left</to>
    	<wrap>no</wrap>
    </action>
</keybind>
<keybind key="C-A-Right">
	<action name="GoToDesktop">
    	<to>right</to>
        <wrap>no</wrap>
    </action>
</keybind>
<keybind key="C-A-Up">
	<action name="Execute">
		<command>amixer -q sset Master 3%+</command>
	</action>
</keybind>
<keybind key="C-A-Down">
	<action name="Execute">
		<command>amixer -q sset Master 3%-</command>
	</action>
</keybind>
That defines the following keybindings:
- Control+Alt+Left: Switches to the left desktop.
- Control+Alt+Right: Switches to the right desktop.
- Control+Alt+Up:: Turns volume a 3% higher.
- Control+Alt+Down:: Turns volume a 3% lower.
Volume display
Now that the keybindings are set and you can turn the volume up and down just pressing some keys, it would be nice to be notified of the current volume percentage.
There are several ways of achieving this. There are some I like, one is using conky, another is using a notification, and there is also the possibility of placing it in the taskbar.
I use conky and it's pretty cool and unintrusive, but for after a lot of time using it I have realised that since most of the time is covered but some window on top I don't pay any attention to it.
The taskbar it's ok, since it's always on top, but I prefer the notification style of OSX for the volume, so I'll be chosing the third one.
There are two pieces now to connect, one is getting the current volume through command line, and then sending it to the desktop. Getting the alsa volume through command line it this easy:
amixer get Master | egrep -o "[0-9]+%"
Then we have to send it to a popup window. For doing so we need two steps, first install a notification server and a client software for sending things to that notification server.
sudo pacman -S notification-daemon libnotify
Once we have done this, we can launch the notification server:
/usr/lib/notification-daemon-1.0/notification-daemon
And then on another terminal window send some test notification to it like this.
notify-send "Test"
This will pop up a notification in the corner like this:

Now then we just have to add the notification server line to our autostart file by doing:
vim ~/.config/openbox/autostart
And then add this line:
/usr/lib/notification-daemon-1.0/notification-daemon &
The & symbol tells that the process will remain running in the background
Next, we will have to create a couple of alias for the keybinding command in /usr/bin with the following commands, first /usr/bin/volumeup:
sudo vim /usr/bin/volumeup
Write the content, which is a very long command, but if you look carefuly at it it's just the concatenation using pipes of all the things previously mentioned:
amixer -q sset Master 3%+ && amixer get Master | egrep -o "[0-9]+%" | xargs -0 notify-send -t 1000 --hint int:transient:1
And give it execution permissions:
sudo chomod +x /usr/bin/volumeup
Do the same for /usr/bin/volumedown but with 3%- instead of 3%+.
And finally modify with volumeup and volumedown the keybindings section in rc.xml like so:
<keybind key="C-A-Up">
	<action name="Execute">
		<command>volumeup</command>
	</action>
</keybind>
<keybind key="C-A-Down">
	<action name="Execute">
		<command>volumedown</command>
	</action>
</keybind>
Then everythig is set up and running. We can test it now.
DBus daemon
At the time of writing this, once you press the volume up or down keys the volume is changed and the notification popup appears showing the current volume, but for some reason the notification-daemon dies after showing up one notification and needs to be restarted. This is reported as a bug here.
But reading the whole report, you find the problem and then the solution.
For running notification-daemon without crashing we need to run it as a DBus service, so we have to create it like so. It's veary easy.
First, lets remove the ~/.config/openbox/autostart line we previously added to launch the notification-daemon, we don't need it anymore.
Then we create a new DBus service like this:
sudo vim /usr/share/dbus-1/services/org.freedesktop.Notifications.service
And write in it the content needed to start the notification-daemon:
[D-BUS Service]
Name=org.freedesktop.Notifications
Exec=/usr/lib/notification-daemon-1.0/notification-daemon
Then we restart all the services, or reboot the machine to test it again and... it's working! Now we have a proper handmade volume control and we've learned some useful things on the way, how cool!