This post is the second part of a series, you can read the previous and next post here:
Part I - Final Fantasy VII scene reconstruction using Blender (Part 1)
Part II - Final Fantasy VII scene reconstruction using Blender (Part 2)
In my last tutorial I explained how to reconstruct the walkmesh, the camera settings, and the objects on a scene from a Final Fantasy VII, using a picture, Blender, and some plug-ins.
The next step I wanted to make was to import this data into a 3D engine, I've chosen webGL using three.js, three.js it's a javascript library that simplifies writing code for webGL, it's super easy to use and understand and works pretty well. This would allow me to load the scene using a web browser without requiring any plug-in.
The first thing that needs to be done is to export the whole Blender scene into three.js and for doing this, the library comes with a Blender plug-in that you can install for doing the job.
At the time of writing this, if you get the library from the master branch, you will not be able to load the scene. The plug-in is currently being rewritten and you will need to grab the new version from the dev branch.
For doing so, clone the dev branch of the threejs project like this:
git clone -b dev https://github.com/mrdoob/three.js.git
Now move the folder three.js/utils/exporters/blender/addons/io_three to the blenders plug-in folder, in my case it was /usr/share/blender/2.76/scripts/addons
Then the plug-in can be activated in Blender:

Now the scene needs to be set up for exporting to Threejs, I had to set some things in order to get an acceptable result.
First, camera size and FOV. I got this by trial and error, and I don't know the exact reason for these values. But in my case I had to set the camera's focal length to 15, and then adjust the camera size in order to fit the whole scene into the camera's borders again.

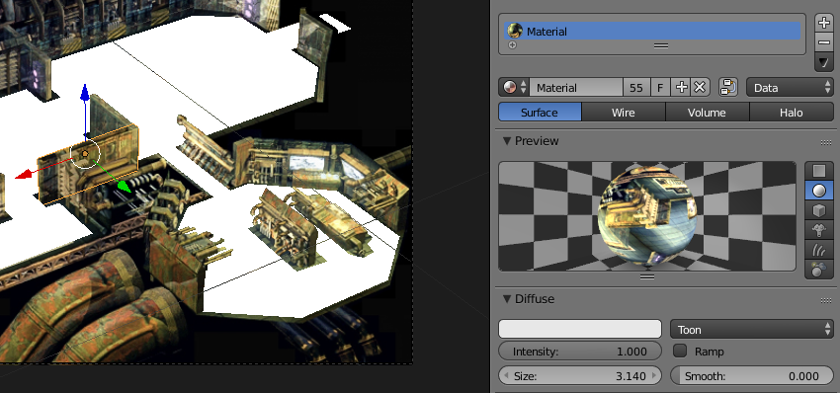
Then I had to set the material for every textured object in the scene. I've created a simple material using the image texture and applied to every textured object in the screen. You can't still export Shadeless materials, and that would be perfect so instead I tried to simulate it using a Toon material.

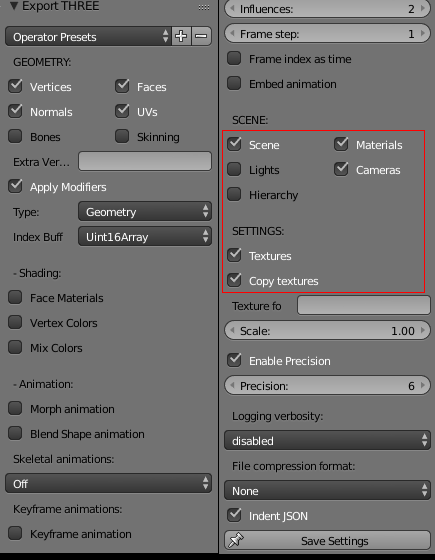
Now you can export the scene by clicking Export » Three.js. Make sure you check the following options:

It's specially important to set the options highlighted in red. You can save these settings for using them later by clicking the Save Settings button.
Finally click the export button, the scene will be saved as a JSON file. You can open and review it using any text editor, just to make sure that everything is correct.
Once you've got the file, you can start coding the website where the scene will be displayed.
The resulting website will look like this:

I will publish on github the whole code once I develop some new key features I want.
See you in the next post!
